Building a Budget-Friendly Yet Powerful NAS with Unraid
Update, October 2026: still running on the same hardware, three years in. Read the update.
Introduction
Building a custom NAS (Network-Attached Storage) is an excellent way to gain control over your data while optimizing for performance, expandability, and cost. This post walks through my journey of building a powerful, budget-friendly NAS using Unraid, detailing the hardware selection, setup process, challenges, troubleshooting, and real-world performance.
Why Build a NAS?
A NAS is a dedicated storage server that allows you to centralize data, streamline backups, and host services like Plex, Nextcloud, and virtual machines. Unlike off-the-shelf solutions, a custom NAS offers greater flexibility, upgradability, and cost-effectiveness.
My Motivation
I wanted full control of the system, and I also enjoy building computers. I've built gaming PCs and mining rigs in the past, but this was my first attempt at a NAS. I enjoyed the process of building it myself and learning about NAS-specific technologies like ZFS, Docker, and virtualization.
My Primary Use Cases
- Plex Media Server: Streaming movies and TV shows with hardware transcoding
- Nextcloud: Hosting a private cloud storage solution
- Virtual Machines (VMs): Running test environments for learning and sandboxing applications
- Self-Hosted Password Manager: Managing secure credentials locally
- Automated Backup Solution: Regular data backups for redundancy
- Secure Remote Access: Configured with Tailscale for safe remote administration
- Docker Applications: Running services like AdGuard, Bitwarden, and other self-hosted solutions
Hardware Selection
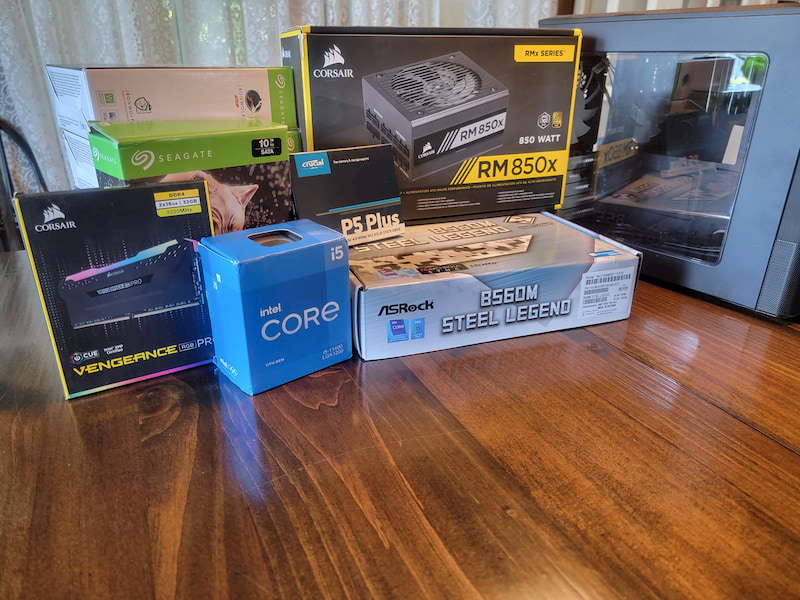
Motherboard: ASRock B560M Steel Legend
I selected the ASRock B560M Steel Legend because it had the correct number of SATA ports for my planned setup and allowed for future expansion if needed. The cost was also very reasonable compared to other boards. It's a micro-ATX motherboard with multiple PCIe expansion slots, making it ideal for a NAS build.
Processor: 11th Gen Intel Core i5-11400
I wanted a lower-power CPU that could handle various processes and had Quick Sync capability for Plex transcoding. The Intel Core i5-11400, with its 6 cores and 12 threads, struck the perfect balance between cost and performance. It's been more than capable of handling multiple Docker containers, VMs, and Plex streams simultaneously.
Cache Drive: Crucial P5 Plus 500GB NVMe SSD
I chose a 500GB NVMe SSD as a cache drive because it was affordable and seemed sufficient for my needs. However, after running the system for a few years, I wish I had gone with a larger capacity. I eventually ran into an issue where the cache drive filled up, causing problems with my Plex server. I had to clear the cache and reinstall the Plex Docker container to resolve the issue. If I were to do it again, I'd opt for at least a 1TB cache drive.
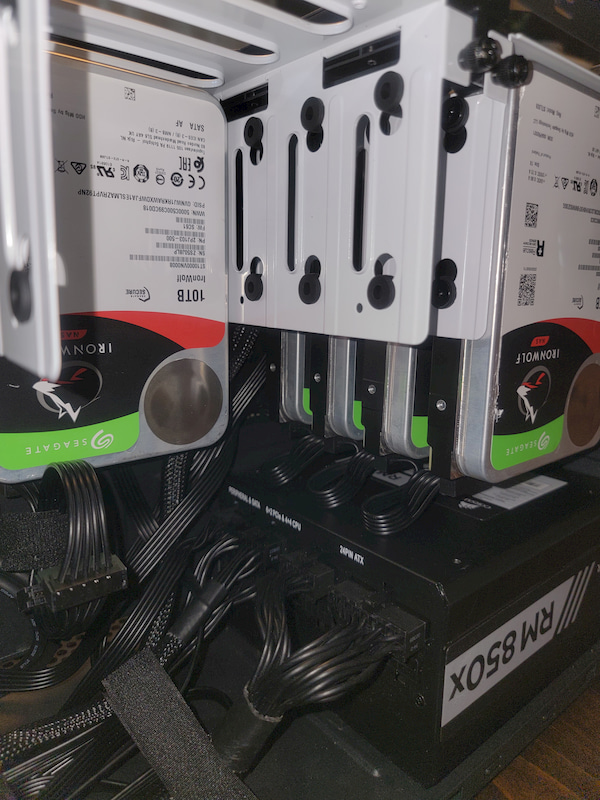
Storage Drives: 5 x Seagate IronWolf Pro 10TB NAS HDD
I got a great deal on these drives from a friend — These drives were originally $225 each brand new, but I was able to buy them from a friend for $100 each! Seagate's IronWolf Pro series is designed for 24/7 operation, with vibration resistance and RAID optimization, making it perfect for NAS usage. The 10TB size provides a solid balance between cost, redundancy, and capacity.
Additional Components
- Memory: CORSAIR VENGEANCE RGB PRO DDR4 32GB (2x16GB) 3200MHz - I wanted a decent amount of RAM to start with, so I went with 32GB. This has been sufficient for running multiple Docker containers and VMs, but I plan to upgrade to 64GB as my needs grow.
- Case: Fractal Design Node 804 - I chose this because of its compact cube-style design and large capacity for hard drives. It has excellent airflow and ample room for future expansion.
- Power Supply: Corsair RM850x, 850W, 80+ Gold Certified - A reliable, high-efficiency power supply ensures stability and allows room for future upgrades.
- UPS: CyberPower 1500VA Sine Wave - A UPS protects against power outages, preventing data corruption and allowing safe shutdowns. I integrated Network UPS Tools (NUT) in Unraid to ensure an automatic, controlled shutdown after 45 minutes without power.
Total Cost Breakdown
| Component | Cost |
|---|---|
| Motherboard | $100 |
| Processor | $140 |
| Cache Drive | $50 |
| Memory | $78 |
| Case | Gift (retail $130) |
| Power Supply | Already owned (retail $100) |
| UPS | $200 |
| Storage Drives (5 x 10TB) | $500 |
| Unraid License (sale price, originally $109) | $80 |
| Total | $1,228 |
Setting Up Unraid
- Flash Unraid OS to USB: Used the Unraid USB Creator to install Unraid onto a bootable USB drive.
- Boot and Initial Setup: Configured network settings, set up storage pools, and enabled Docker/VM support.
- Set Up Shares and SMB/NFS: Created shared folders for Plex, Nextcloud, and general data storage.
- Installed Plugins and Docker Containers: Plex Media Server (optimized for Quick Sync), Nextcloud, VMs, Password Manager, Network UPS Tools (NUT), and AdGuard Home.
Secure Remote Access with Tailscale
Tailscale was recommended by my cybersecurity expert friend, and I found the setup to be simple and straightforward. It allows me to securely access my NAS from anywhere without exposing my network to the internet.
Performance and Benchmarks
- File Transfer Speeds: ~900 Mbps cache to LAN (limited by 1GbE networking)
- Direct HDD Writes: ~200 MB/s sequential writes
- Plex Transcoding: Works perfectly with multiple simultaneous streams. At most, I've had about five streams running at once, and the system handled it without any issues.
- VM and Docker Responsiveness: Very responsive with the hardware I selected. I haven't noticed any slowdowns, even when running multiple services simultaneously.
Challenges and Lessons Learned
- Cache Drive Size: I regret not choosing a larger cache drive. When the 500GB drive filled up, it caused issues with my Plex server, requiring me to reinstall the Docker container.
- Case Selection: While I love the Fractal Design Node 804, there are newer small form factor cases that I might consider if I were to rebuild the system.
- Research and Planning: Taking the time to research components and plan the build was crucial. Resources like PCPartPicker, the Unraid forums, and Reddit were incredibly helpful.
Future Upgrades
- Larger Cache Drive: I plan to upgrade to a 1TB or larger NVMe SSD for better cache performance.
- More RAM: I'll likely expand to 64GB as my needs grow.
- Network Upgrade: When I build my new home, I plan to set up a network rack with Ubiquiti hardware and potentially upgrade to 10GbE networking.
Update: October 2026
Three years later, the NAS is still running on the exact same hardware with no hardware problems at all. The drives, the i5-11400 and the Node 804 have all held up without a hiccup.
The only real issue I've had: after an Unraid system update, my Docker containers were gone. Losing every self-hosted service at once is not a fun thing to see, but it took about 25 minutes to get everything back up and running. Lesson learned: back up your Docker configuration before running system updates, so a recovery is a quick restore instead of a rebuild.
Conclusion
Building a custom NAS with Unraid offers a flexible, powerful, and cost-effective solution for home storage, media streaming, and self-hosting. The ability to scale storage easily and integrate various services makes Unraid a fantastic choice for a homelab NAS.
Would I recommend this build? Absolutely—especially if you value customization, performance, and control over your data!